Monday, October 22, 2012

The Pinterest Bread Fiasco

Yes, I will admit it.  I am totally addicted to Pinterest.  I love to waste time scrolling through endless pins that promise untold levels of blissful creativity.  This weekend I guess I was craving a culinary adventure, so food pins were catching my interest. The title of my Pinterest recipe board is "Food Porn".  I feel that it is aptly named because the images posted there are meant to cause lust in the eye of the beholder while the end product is unattainable and usually unfulfilling. 


Mmmm...Homemade bread.  Mouth watering, right?
 This weekend I fell victim to the false hope of making homemade bread effortlessly in my cast iron dutch oven.  The pin bragged  that the bread "tastes like expensive restaurant artisan bread, but literally takes 5 minutes of work. Chewy and soft on the inside, crisp and crunchy on the outside."  I looked at the list of ingredients - flour, yeast, salt, and water.  That sounded simple...too simple.  I should have known better, but with my husband eagerly encouraging me to discover the secrets of breadmaking, I decided to try it. 

I mixed up the ingredients and let it sit overnight for the first rise.  Everything looked just as it should until it came time to turn the dough out and form it into a ball for the second rise.  The pictures showed a beautifully formed ball of silky smooth dough.  What I had was a big, glob of ooky, sticky, gummy mess.  I meant to take a picture, but my hands were too glopped up to even think about it!  By the time I got done wrestling 'the blob', as I referred to it in my head, I was seriously regretting my decision making capabilities.  Determined to make it work, I perservered.

The recipe says to heat the dutch oven for 30 minutes at 425-450 degrees.  When I opened the oven door, I realized that the pot was smoking.  It had the sickly overheated Crisco smell.  The comments on the recipe had mentioned the possibility, so I just kept forging on.  I dumped my poor excuse for bread dough in the pot, put on the lid, set the timer, and hoped for the best.

When it was done, I took off the lid and my hopes for a miraculous transformation were completely squashed.  My bread was ugly.  There was no getting around that point.  I just hoped that it tasted good.


The Bread of Frankenstein!
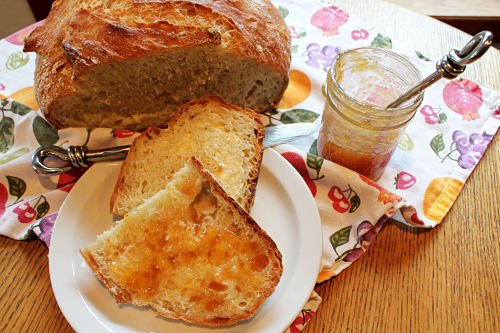
The crust on top was crisp as promised, and the bottom was downright hard.  I couldn't cut it.  I had to just break off the slices.  The inside was chewy alright.  I baked it to the required 200 degree internal temperature, but it was still a bit gummy.  The worst parts were that in places it tasted like the smoke from the pot, and there were little flour pockets throughout from my completely incompetent preparation of the dough ball. 


The Autopsy

Will I try this recipe again?  Dunno.  If I do, I'll be doing a little more homework first to compare other recipes and tips for breadmaking.  Don't get me wrong.  I'm not saying that the recipe isn't good.  I'm just saying that it didn't work well for me.  Maybe I missed something or just plain screwed up, but it definitely did not deliver the "artisan quality" bread that I was lusting after.

Tuesday, October 9, 2012

C is for Cookie!!

A week or two ago, we were strolling through the grocery store for our weekly stock up run when my oldest son stopped to admire the refrigerated cookie dough section.  Usually I wheel quickly past since I prefer to make my cookies from scratch.  This time I let my son convince me that it would be good to have some ready-made chocolate chip cookie dough on hand.  He suggested that we could just keep it in the fridge and eat it raw.  (Isn't it funny how kids figure out how to exploit our weaknesses??)  In some sense of duty to make sure that he understands that you aren't actually supposed to eat it raw, I suggested that we make a cookie pizza and decorate it with icing.  He agreed and we headed on about our business. 

Once we got the dough home, it was loaded in a drawer of the fridge and promptly forgotten (by me anyway).  A couple of weeks later, my son ran across it and reminded me of my promise.  So once little brother was down for a nap, we rolled it out.  Well, maybe it was closer to pounding.  That stuff is very hard when it is cold!

Tip:  We rolled it out between two layers of parchment paper.  When it was the desired thickness, we peeled off the top layer and slid the rest onto a cookie sheet.  No mess = No cleanup!!

Once the cookie was baked to golden brown and delicious perfection...it was bedtime.  So we wrapped it up for the night and came back to it the next day!  Parting is such sweet sorrow...

Anyway, the next day I started getting together my ingredients for the icing.  I usually use all butter, but I didn't have enough.  I decided to subsitute with butter flavored Crisco, and I was very pleased with the end product. 

Here is the recipe that I used:

Buttercream Icing

1/2 cup butter
1/2 cup butter flavored Crisco
4 cups powdered sugar
1 Tbsp vanilla flavoring
1 Tbsp milk

I never remember to soften my butter in advance, so I usually throw the cold butter in my KitchenAid mixer and beat it into submission.  Once it gets creamy, you can add the Crisco. 

Next, it is time to work in the powdered sugar at low speed.  (BTW, I never sift it first.  I figure that the mixer can break up the lumps.  I haven't had a problem yet!)

Once the sugar is in, it is time to add the vanilla.  Make sure that you shake it up well before you measure it out.  The good stuff settles to the bottom when it is on the shelf. 

The last step is to adjust the consistency.  Add milk 1 tablespoon at a time until it is thin enough to pipe or spread.  If you do too much, you can compensate by adding a little more powdered sugar.  This is also the time to add color, if desired.

What you end up with is a bowl full of fluffy goodness that is ready to spread or pipe onto the confection of your choice. 

Finally, here is a picture of our end product.  Keep in mind that it was completely decorated by my 9 year old son.  Ok, I admit that I helped a bit with the border.  By the time we were finishing up, he had gotten bored with decorating and just wanted to eat the leftover icing with a spoon.  Kids!


My son's yellow buttercream castle cookie pizza.


Tuesday, October 2, 2012

Mmm...Chocolate!

It was almost bedtime when I went to the refrigerator looking for "a little something", a treat to satisfy my sweet tooth without requiring too much effort. Standing there gazing into all of the chilly options, my eyes came to rest on a brown plastic bottle of chocolately goodness. (You know the one. I believe it is standard equipment for any family fridge.) I poured myself a tall glass of cold milk and picked up the bottle to start the ritual of preparing chocolate milk, but it seemed a little too light. I shook it for all I was worth and held my breath as I attempted to squeeze what was left of it's contents into my glass. I was rewarded with an insulting rasping sound that would have been sure to reduce my 9 year old boy to giggles. We were out of chocolate syrup!

My mind began to race thinking of other options, and I vowed that I would find a recipe for homemade chocolate syrup. So over the next couple of days I did a little internet research and found that there are lots of recipes out there. They have a lot of things in common: sugar, cocoa powder, vanilla, water. Those are common staples in my home, so I decided to proceed with the chocolate syrup project as soon as I found a moment's peace (traslation: as soon as hubby and the kids laid down for a Sunday afternoon nap).


Once that moment arrived, I pulled up Alton Brown's Cocoa Syrup Recipe and went to work. The instructions were clear and easy to follow. I only wish that I had read more carefully. After I got things boiling, I realized that my pot was a bit on the small side. This meant that it kept coming dangerously close to boiling over. I had to watch it like a hawk, removing it from the heat when it got too close to the edge. The other thing that I didn't pay close enough attention to was that the recipe called for corn syrup. (The only time I keep that in the house is when I'm making brittle at Christmas.) I left it out and hoped for the best.

My end result was a nice rich chocolate syrup that has been blessed by all members of my household. It is not quite as sweet at the store bought variety, and has a darker, richer flavor. The consistency turned out quite well after it cooled and spent some time chilling in the fridge.